


Construction site perimeters carry heavy liability. An unsecured boundary invites unauthorized access by civilians, children, and pets. This exposure subjects contractors to severe safety risks, immediate project shutdowns, and heavy regulatory fines. Poorly planned temporary fencing frequently leads to blowovers, sagging perimeters, and compromised site security. These failures cost contractors significant time, divert labor from core construction tasks, and damage their professional reputation in the community.
You need a reliable, unyielding physical boundary. This guide serves as a technical blueprint for evaluating site requirements, securing permits, selecting the correct barrier materials, and executing a compliant, durable installation. We cover exactly how to match materials to specific environmental factors and execute a setup that withstands harsh weather conditions and active job site hazards.
Compliance First: Site perimeters must meet specific OSHA guidelines and local municipal codes regarding height, visibility, structural integrity, and permitting.
Material Matching: Choosing between rigid panels, a plastic safety fence, or a warning fence net depends entirely on the specific application (perimeter security vs. internal hazard zoning).
Structural Integrity: Proper tensioning, post spacing, secure anchoring, and wind-load mitigation are the primary differentiators between a fence that fails and one that lasts the duration of the project.
Resource Allocation: Contractors must weigh the labor costs, equipment requirements (e.g., core drilling), and liability of in-house installation against the reliability of hiring specialized temporary fencing contractors.
Defining Success Criteria for Construction Safety Fences
OSHA, Local Code Compliance, and Permits
Regulatory compliance forms the foundation of any site perimeter strategy. Federal safety guidelines dictate baseline requirements for protecting workers and the public from job site hazards. Inspectors evaluate barriers based on minimum height requirements, structural stability, and the presence of high-visibility signage. Excavation sites require specific barrier distances from the trench edge to prevent accidental falls or equipment cave-ins. You cannot simply throw up a visual barrier and expect it to pass a structural safety inspection.
Local municipal codes frequently supersede federal guidelines, especially in dense urban environments. City building departments often mandate specific barrier types for projects bordering public sidewalks or active roadways. Navigating the municipal permit process before installation prevents costly work stoppages. Securing the right permits ensures your perimeter strategy aligns with local expectations for pedestrian protection and traffic control.
Submit a detailed site plan to the local building department showing the exact fence line.
Apply for a right-of-way permit if the barrier encroaches on public sidewalks or streets.
Schedule a pre-installation inspection if mandated by local municipal codes.
Post all required permit documents and emergency contact signage directly on the barrier.
Perimeter Security vs. Hazard Warning
Contractors must establish the functional difference between external perimeter security and internal hazard zoning. Keeping the general public out of a construction site requires rigid, anti-climb barriers. These primary perimeters demand lockable gates, heavy-duty anchoring, and materials that resist tampering. The goal is absolute exclusion. You want to stop a determined trespasser from walking onto the active site after hours.
Conversely, keeping authorized workers away from internal hazards requires high-visibility visual barriers. Open trenches, temporary material storage, or heavy machinery paths do not always need rigid steel panels. Instead, these zones require bright, easily identifiable boundaries that signal danger to personnel already authorized to be on the site. Matching the barrier function to the specific hazard eliminates wasted resources and keeps your crew moving efficiently.
Neighborhood Safety and Liability
Securing residential construction sites carries unique liability challenges. Neighborhoods present a constant risk of curious children and pets wandering near hazardous drop-off zones or heavy machinery paths. The attractive nuisance doctrine holds property owners and contractors liable if a site draws children in and results in injury. You cannot rely on warning signs alone when dealing with residential foot traffic.
A robust perimeter mitigates this specific liability. The barrier must eliminate gaps at the bottom edge where small animals might crawl through. It must also lack obvious footholds to deter climbing. Maintaining a secure, continuous boundary demonstrates a commitment to community safety and shields the contracting firm from devastating legal action. If a barrier falls down over the weekend, your liability exposure skyrockets until Monday morning.
Durability, Lifecycle, and Site Image
Temporary fencing must survive the entire project lifecycle without constant replacement. Success metrics include high UV resistance to prevent plastic degradation under direct sunlight. Tear strength determines how well the material handles accidental impacts from materials or machinery. The barrier must withstand site-specific weather conditions, including high winds and heavy snow loads. Cheap materials shatter in freezing temperatures or melt and stretch in extreme heat.
Beyond physical durability, the perimeter projects the contractor's professional image. A taut, well-maintained boundary signals an organized, safety-conscious operation. Sagging, torn, or leaning barriers suggest negligence. Maintaining a clean aesthetic reflects well on the contractor and builds trust with clients, inspectors, and the surrounding community. A sloppy fence implies sloppy construction work.
Evaluating Safety Fence Materials and Types
Plastic Safety Fence
High-density polyethylene (HDPE) forms the core of a modern plastic safety fence. This material delivers exceptional visibility while remaining incredibly lightweight. Crews can easily cut the rolls to specific lengths using standard utility knives, making it highly adaptable to irregular site shapes. The extrusion process creates a smooth, snag-free surface that resists tearing under moderate tension. You can roll out hundreds of feet in a matter of minutes with a two-man crew.
The best use cases for this material involve internal hazard zoning and short-term visual boundaries. Contractors frequently deploy it to establish tree protection zones, mark residential property lines during renovations, or block off freshly poured concrete. It serves as an unmistakable visual warning rather than a physical barricade against determined entry. Do not use this material to secure high-value tools overnight.
Warning Fence Net
A warning fence net utilizes a woven mesh design rather than a rigid extruded grid. This woven structure provides significant wind permeability, allowing heavy gusts to pass through the material rather than pushing against it. The tighter mesh also offers secondary benefits for debris containment, catching lightweight materials before they blow off the site. The woven strands distribute tension evenly, preventing localized tearing at the fastener points.
This netting excels in scaffolding enclosures and high-rise construction zones. It provides essential dust control for masonry cutting stations or demolition areas. Whenever a site requires a visual barrier that will not act as a wind sail, woven netting provides the most stable, long-lasting solution. It handles high-altitude wind shear much better than solid plastic sheets.
Temporary Chain Link & Weighted Panels
Rigid temporary chain link panels provide the highest level of site security. These modular steel frames feature an anti-climb structure and integrate seamlessly with lockable vehicle and pedestrian gates. The heavy-duty construction resists vandalism and forced entry, creating a true physical barricade. The galvanized steel wire withstands severe impacts from machinery and prevents unauthorized access to hazardous zones.
Contractors rely on weighted panels for primary site perimeters on long-term commercial projects. They provide overnight equipment security in high-traffic urban areas. While they require more effort to deploy, the modular design allows crews to reconfigure the perimeter as the construction phases evolve. You will need machinery or a dedicated labor crew to move these panels efficiently.
Conceptual Trade-offs
Procurement decisions require balancing upfront material investments against deployment speed and security needs. Lightweight rolled materials deploy rapidly with minimal labor, but they offer zero protection against trespassing. Rigid panels provide maximum security but demand heavy lifting, flat terrain, and specialized anchoring tools. You must evaluate the specific site risks before ordering materials.
Material Type | Primary Function | Wind Resistance | Deployment Speed | Security Level |
|---|---|---|---|---|
Extruded Plastic Roll | Visual Warning | Low to Medium | Very Fast | Low |
Woven Netting | Debris & Dust Control | High (Permeable) | Fast | Low |
Rigid Steel Panels | Physical Security | Medium (Requires Weights) | Slow | High |
Pre-Installation Planning and Site Layout
Mapping the Perimeter and Topography
Successful installation begins with a comprehensive site walk. Project managers must map the exact perimeter, noting any severe grade changes or uneven terrain. Rolling hills require stepping or racking the barrier to maintain a consistent height without leaving large gaps at the bottom. Topography dictates the anchoring strategy. You cannot use standard flat-panel bases on a 15-degree slope without heavy modification.
Soil conditions play a massive role in layout planning. Driving posts into soft, loamy dirt requires longer stakes to achieve stability. Encountering hardscapes like asphalt, concrete, or dense rocky soil demands entirely different equipment. Identifying these zones early prevents crews from stalling during the installation phase. If you hit bedrock six inches down, your standard T-posts become useless.
Designing Gate Layouts and Access Points
A secure perimeter requires controllable access points. Plan dedicated entryways before driving the first post. You must separate heavy machinery access from pedestrian worker entry. Mixing concrete trucks and foot traffic at a single gate creates a severe pinch-point hazard. Designate specific zones for material deliveries to keep the main thoroughfare clear.
Position vehicle gates on flat, stable ground with adequate swing clearance. Ensure pedestrian gates connect directly to safe walkways, keeping workers away from active excavation zones. Limiting the number of access points makes it easier to monitor site entry and maintain overall security. Every additional gate is another potential failure point that requires daily locking and inspection.
Identifying Underground Utilities
Driving steel posts blindly into the ground invites disaster. Striking a buried electrical line, gas pipe, or water main causes immediate danger to the installation crew. It also triggers massive repair bills and project delays. You must contact local utility locators before breaking ground. In the United States, calling 811 is a mandatory step before driving any stakes deeper than a few inches.
Utility crews will mark the site with color-coded paint or flags indicating the exact location of underground infrastructure. Red indicates power lines, yellow marks gas, and blue denotes water. Adjust your perimeter layout to maintain a safe buffer zone away from these critical utilities. Never assume a site is clear just because it looks undeveloped. Old utility lines often run through empty lots.
Calculating Material Requirements
Accurate material estimation prevents mid-project supply runs. Start by measuring the total linear footage of the planned boundary. Divide this number by your planned post spacing to determine the exact number of T-posts or weighted bases required. Always add a 10% overage to account for corners, gate reinforcements, and uneven terrain.
Measure the total linear footage of the perimeter using a measuring wheel.
Divide the total footage by 6 or 8 to determine the baseline post count.
Add two extra posts for every planned corner to create proper bracing.
Calculate fastener counts by multiplying the total post count by four.
Inventory all gate hardware, including hinges, drop rods, and padlocks.
Step-by-Step Safety Fence Installation Process
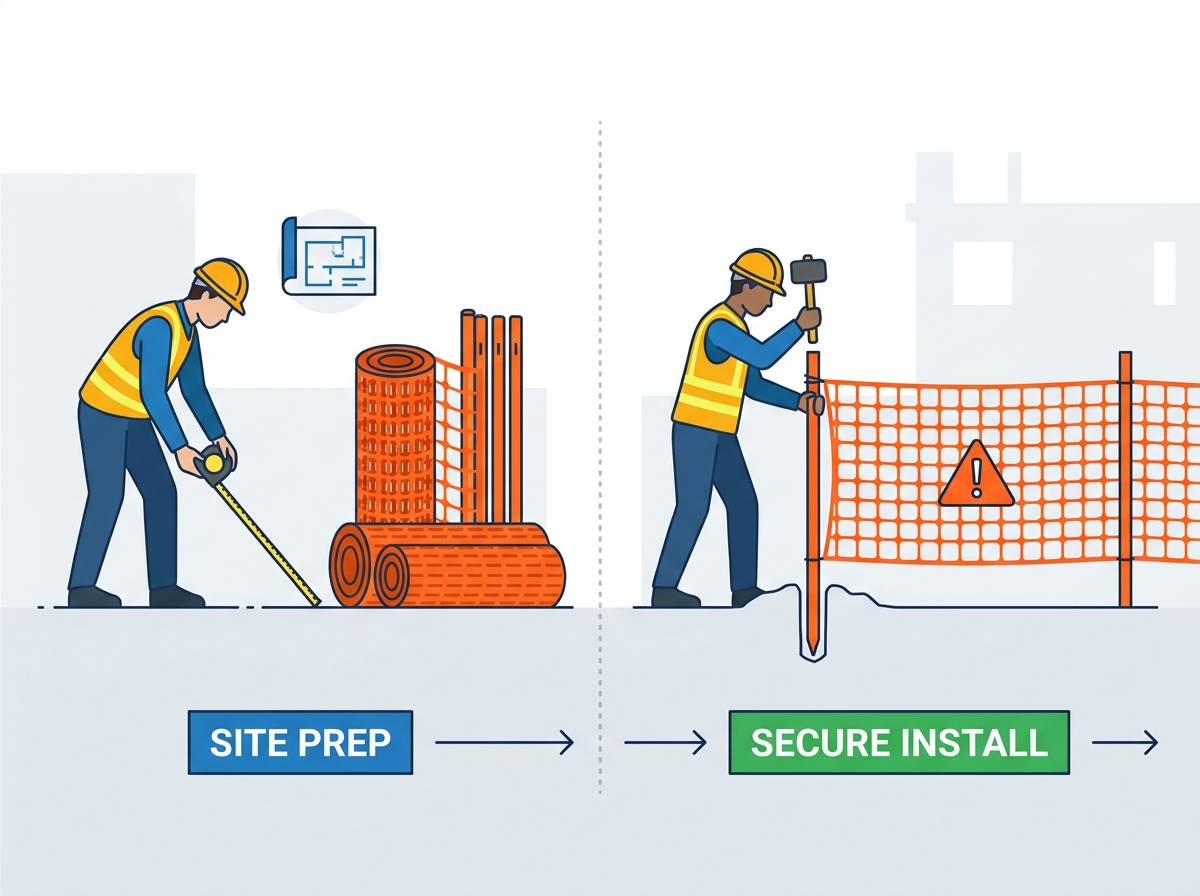
Step 1: Setting the Anchor Points and Corner Posts
Structural integrity begins at the corners. The corner posts bear the brunt of the tension when you pull the material taut. If a corner fails, the entire line sags. Start by driving your primary corner posts deeper than the standard line posts. For soil installations, drive a standard studded T-post at least 24 inches below grade. Use a heavy-duty pneumatic post driver to ensure the post seats firmly into the subsoil.
Establish a perfectly straight line between these anchor points using a high-visibility string line. This string serves as your guide for the remaining installation. Do not rely on visual estimation. A wandering perimeter looks unprofessional and creates uneven tension across the barrier material. Pull the string tight and secure it at the exact height you want the top of the mesh to sit.
Step 2: Spacing, Driving Posts, and Hardscape Anchoring
Maintain strict post spacing to ensure stability. Standard requirements dictate a post every 6 to 8 feet. Stretching the spacing to save materials guarantees a sagging, weak boundary. Mark the post locations along your string line using marking paint. Keep the spacing consistent to distribute the wind load evenly across the entire barrier.
Drive soil posts using a manual post pounder or a pneumatic driver for larger sites. Ensure the studs on the T-posts face inward toward the site to catch the mesh. When crossing hardscapes, switch to core-drilling. Drill a precise hole into the concrete or asphalt, insert a sleeve, and drop the post in for unyielding stability. Alternatively, use heavy rubber base weights designed specifically for temporary construction panels. Do not use cinder blocks, as they shatter easily under impact.
Step 3: Unrolling and Tensioning the Orange Safety Fence
Begin unrolling the orange safety fence at your strongest corner post. Secure the starting edge with multiple heavy-duty, UV-resistant zip ties. Unroll the material along the outside of the posts. Weaving the material back and forth between posts seems clever, but it actually creates uneven tension and makes replacement difficult. Keep the roll on the outside face of the perimeter.
Pull the material taut before securing it to the next post. Use a tension bar or leverage a spare post against the mesh to pull it tight. The material should snap back slightly when pushed. Secure the top edge first, then the middle, and finally the bottom. Keep the bottom edge flush with the ground to prevent debris from escaping and animals from entering. Leave no gaps larger than two inches at the base.
Step 4: Securing the Warning Fence Net
Woven netting requires a slightly different approach. Because it catches less wind, you can pull it exceptionally tight. Fasten the netting using specialized wire clips or heavy-duty zip ties rated for outdoor use. Standard lightweight nylon ties will snap under the tension of a taut net during the first major windstorm. Use ties with a minimum tensile strength of 50 pounds.
When joining two rolls of a safety fence, overlap the seams by at least 12 inches. Weave your fasteners through both layers of the mesh to create a continuous, unbroken boundary. This overlap maintains structural integrity and ensures continuous coverage for dust and debris control. Never butt the edges together, as they will pull apart under tension.
Step 5: Gate Setup and Access Control
Install secure, lockable gates at your predetermined access points. For rigid panel systems, use dedicated gate panels with welded hinges and heavy-duty drop rods. Ensure the hinges operate smoothly without dragging on the ground. Install a wheel on the leading edge of large vehicle gates to prevent the frame from sagging over time.
For rolled mesh boundaries, create a functional gate by installing two posts close together. Attach the mesh securely to one post, and use carabiner clips or reusable heavy-duty bungee cords to attach the mesh to the second post. This creates a secure, temporary access point that does not compromise the tension of the adjacent line. Instruct your crew to close and secure this access point immediately after use.
Implementation Risks and Mitigation Strategies
Wind Load and Blowovers
Wind load represents the most common failure point for temporary site perimeters. Solid barriers and tightly woven materials act as massive sails. When a strong gust hits a poorly anchored line, it generates immense horizontal force, snapping posts or tipping weighted bases. A collapsed perimeter immediately violates safety codes and halts work. You must account for local wind patterns during the planning phase.
Mitigate wind risks through strategic planning. Use high-visibility weighted bases and reinforce them with heavy sandbags during storm seasons. Ensure you use UV-rated sandbags, as standard burlap or cheap plastic bags disintegrate in the sun within weeks. If you must use solid privacy scrims on rigid panels, cut semi-circular wind slits into the fabric. These vents allow high-pressure air to escape, drastically reducing the total force exerted on the metal frames.
Sagging and Tension Loss Over Time
Material stretching is an unavoidable reality. Temperature fluctuations cause plastic polymers to expand in the summer heat and contract during winter freezes. Over several weeks, a perfectly taut line will inevitably begin to sag. Sagging barriers look unprofessional, reduce the effective height of the boundary, and create tripping hazards. A loose fence also flaps violently in the wind, accelerating material fatigue.
Combat tension loss by scheduling routine maintenance checks. Designate a site safety officer to walk the perimeter weekly. They should carry extra zip ties, wire snips, and a tensioning tool. Re-tensioning the line takes minimal time but preserves both the safety integrity and the professional appearance of the job site. Replace any broken fasteners immediately before the slack spreads down the line.
Vandalism and Unauthorized Access
Urban construction sites face a high risk of vandalism, cut barriers, and stolen materials. Thieves easily slice through plastic mesh with a pocket knife to access valuable tools and copper wiring left overnight. Even rigid panels suffer from tampered hinges or removed connection clamps. A compromised perimeter leaves your expensive equipment completely exposed.
Evaluate your specific crime risk before selecting materials. In high-risk areas, upgrade immediately to rigid steel panels. Use anti-tamper fasteners and specialized clamps that require specific wrenches to remove. Implement daily lock checks at the end of every shift. A barrier only works if the access points remain completely secure after the crew goes home. Consider adding motion-activated lighting near the main gates to deter nighttime tampering.
In-House Installation vs. Professional Fencing Contractors
When to Use Internal Crews
Deploying your own labor force makes sense under specific conditions. In-house installation works perfectly when deploying lightweight rolled materials for internal hazard zoning. If your crew needs to block off a freshly excavated trench or establish a short-term visual warning around a concrete pour, they can execute this quickly. You do not need to call a subcontractor for a 50-foot internal barrier.
DIY installation suits low-security projects with soft soil conditions. If the perimeter requires standard T-posts driven into dirt and simple mesh unrolling, your general laborers can handle the task without specialized training. This approach keeps immediate cash outlays low and utilizes existing manpower. Just ensure your site superintendent verifies the post spacing and tension before signing off on the work.
When to Hire Professionals
Outsourcing becomes necessary when the perimeter complexity increases. Navigating complex municipal permit requirements often requires a contractor who specializes in local codes. If the site requires drilling into hardscapes, installing miles of continuous perimeter, or managing heavy steel panels, professional crews bring the necessary heavy equipment. They can core-drill concrete and set posts in a fraction of the time it takes a general labor crew.
Hiring professionals also transfers the liability for strict code compliance. Specialized fencing contractors guarantee their work meets OSHA and local standards. If an inspector finds a flaw, the fencing contractor corrects it. This insulates your core construction business from perimeter-related fines. You pay a premium for their service, but you buy peace of mind and guaranteed regulatory compliance.
Cost vs. Value Analysis
Contractors must look beyond the initial invoice when deciding between in-house and professional installation. Consider the hidden costs of in-house labor. Every hour your skilled carpenters or laborers spend driving T-posts is an hour they are not advancing the actual build. Diverting workers from core tasks delays the project timeline and burns through your labor budget.
Factor in the equipment rentals required for proper installation, such as core drills, pneumatic post drivers, and material handling machinery. Finally, weigh the risk of improper installation. A collapsed perimeter requires immediate rework and halts site operations. Paying the upfront premium for a specialized contractor often yields higher overall value through speed, compliance, and guaranteed durability.
Conclusion
Map your site perimeter and mark all required vehicle and pedestrian access gates on the blueprint.
Call your local utility locator to mark all underground lines before driving any posts or drilling into hardscapes.
Submit your perimeter plan to the local municipal building department to secure necessary right-of-way permits.
Order your barrier materials and heavy-duty fasteners based on your linear footage calculations plus a 10% overage.
Schedule a weekly perimeter inspection to re-tension sagging lines and replace broken fasteners.
FAQ
Q: Do I need a permit to install a temporary safety fence around my construction site?
A: Municipal requirements vary significantly by region. Permits are frequently required for perimeter fencing that impacts public sidewalks, blocks right-of-ways, or exceeds certain height limits. Always check with your local building department before installation to avoid fines and work stoppages.
Q: How far apart should posts be for an orange safety fence?
A: Maintain a standard spacing of 6 to 8 feet between posts. This distance provides enough support to keep the material taut and prevents sagging. Stretching the spacing beyond 8 feet compromises the structural integrity and visual effectiveness of the barrier.
Q: Does a plastic safety fence meet OSHA requirements for fall protection?
A: No. Plastic mesh serves strictly as a visual warning barrier to keep personnel away from hazards. It does not possess the structural strength to arrest a human fall. True fall protection requires engineered guardrail systems, safety nets, or personal fall arrest systems.
Q: How do you secure a warning fence net on concrete surfaces?
A: You cannot drive standard posts into concrete. Instead, use heavy-duty weighted rubber bases designed for temporary panels, reinforce them with sandbags, or core-drill holes into the concrete to insert steel pole sleeves for a rigid, unyielding anchor.
Q: How do you install a functional gate in a plastic safety fence?
A: For temporary access, install two posts closely together. Secure the mesh permanently to one post. Use heavy-duty carabiner clips or reusable bungee ties to attach the overlapping mesh to the second post, creating a secure, easy-to-open entryway.
Q: What is the standard height for a construction safety fence?
A: Height requirements depend on the application. Internal visual hazard warnings typically require a 4-foot height. External perimeters designed to secure the site from the public generally require a 6-to-8-foot height, depending on local municipal codes.


